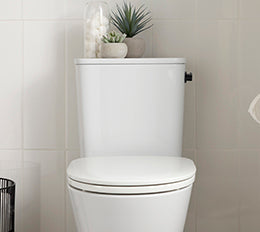


How to Install a Toilet in 3 Easy Steps
If the time has come to replace your toilet, you may think you need to call in a professional to do the installation. Although there are lots of things that should be left to the experts, you’d be surprised how easy it is to complete this DIY job on your own. We’ve got you covered with everything you need to know to set you up for toilet installation success! Before you begin, here are a few key things you’ll need to do first.
Prior to purchasing your new toilet, you’ll need to know the “rough-in” measurements of your old toilet. While the majority have a waste pipe centered 12 in. from the back wall of the toilet, there are some that measure 10 in. or even 14 in. To check yours, all you need to do is measure from the wall to the hold-down bolts on your toilet.
Next, gather the tools and materials required to install your new toilet so you have everything at your fingertips as you get to work. These include:
- Pliers (slip-joint, needle nose, and locking)
- 4-in-1 screwdriver
- Adjustable wrench
- Level
- Drill
- Brass toilet bolts
- Caulk
- Flexible water supply
- Plastic shims
- Toilet flange
- Tape measure
- Sponge
- Gloves
- Rag
- Utility knife
- Wax ring
- One- or two-piece water closet
- Toilet supply tube
Now that you’re armed with everything you need, it’s time to get to work!
Step 1 - Preparation:
Disconnect your water supply by closing the supply valve and flush your toilet to drain the water. Remove the tank lid, remove the refill tube from the overflow pipe and drain water from the tank. Wearing rubber gloves, use a sponge and bucket to remove remaining water from the bowl.
Remove nuts, caps, tank and bowl
Unscrew the bolts attached to the tank of your toilet, then remove the tank from the bowl and set aside on a towel. Using an adjustable wrench, loosen the bolts on the base of your toilet and remove the caps and nuts. They may be hard to loosen, so be prepared to cut them using a hacksaw blade if needed. Cut the caulk seal around the base of your bowl, remove the bowl and set aside on a towel. Cover drain hole with rag to prevent gas from escaping into the house.
Remove the wax seal
Using a knife, remove the wax seal from the floor. Clean the drain hole, replacing any bolts that are rusted.

Step 2 – Replacement:
Replace wax seal and toilet bowl
Caulk the base around your new bowl and carefully place a new wax ring on the floor between the bolts. Take your new bowl and with a helping hand, carefully guide it into place over the drain hole. If your toilet rocks and is uneven, this will eventually lead to breaking the wax ring seal and cause it to leak. So check carefully that it is in place evenly, and for any unevenness, slip stainless steel washers in to fill gaps.

Replace and tighten bolts
In this step, be careful not to over tighten or you could crack your tank. When choosing nuts and bolts, opt for brass if you can. They won’t rust, and they are easier to remove when the time comes.
Step 3 – Reassembly:
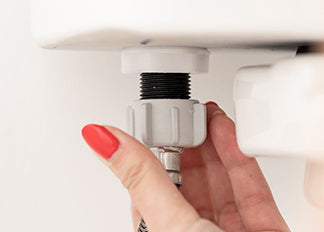
Working in reverse, reassemble everything that you took apart. When you reattach your water supply line, consider buying a flexible one. They are easier to install than the plastic or metal versions. When sealing, make sure to hold the hose so it points into the fill valve as you screw on your connectors.
Working in reverse, reassemble everything that you took apart. When you reattach your water supply line, consider buying a flexible one. They are easier to install than the plastic or metal versions. When sealing, make sure to hold the hose so it points into the fill valve as you screw on your connectors.

Ensure toilet is level
As your final steps, measure to ensure your toilet is level and turn your water supply back on, checking for leaks.
All you have to do is follow these 3 easy installation steps, and you’ll be a porcelain pro in no time!
Love, American Standard

Learn More from American Standard
 LIFE.LOVE.HOME
Create An Account
*Required Fields
 Setting The Standard
RESET YOUR PASSWORD
Enter your email address and we'll send you an email with a link to reset your password.
 ELEGANCE ENGINEERED TO ENDURE
